Docker

Exploring something new.
Have you ever faced the issue “It is not working in my machine why won’t it work in yours?“. The solution is DOCKER!!.
Let’s understand this with an example. Assume we are a team of two working on a project. I am a developer using Java version 19, and you are a tester using Java version 17. After completing the project, I push it to a version control system like GitHub and ask you to test the application.
Here comes the actual problem. When you try to test the project in your local environment, you encounter errors because you are using a different version of Java. These are generally known as version conflicts. This leads to the common issue: "It works on my machine, why won’t it work on yours?"
The solution to this problem is DOCKER!.. Docker will eliminate this kind of problems in order to maintain consistency in Software Development Life Cycle.
Installation: Visit the link and download docker desktop for your machine Download Docker
Important terms to know :
Images
Containers
Images:
Images are like snapshots of file systems and configurations . It includes everything to run a application.
Containers:
Containers are where your application actually runs. They use the image as a starting point but can have changes and updates applied during their runtime.
Important docker commands:
docker run IMAGE-NAME [Used to create and start an image]
docker pull IMAGE-NAME [Used to pull an image from repository]
docker ps [Used to list all the containers]
docker run -d IMAGE-NAME [Used to run container in a detached mode]
docker ps -a [Used to list all containers running and stopped ones]
docker start CONTAINER-NAME[Used to start an existing container]
docker stop CONTAINER-NAME[Used to stop a container]
docker bind -p HOST-MACHINE-PORT:CONTAINER-PORT[Used to bind ports]
docker logs [Used to see logs of containers ]
Dockerfile :
A Dockerfile is a plain text file which is used to automate the build process of an image. It is a blue print which consists of all kind of information of an image like dependencies ,ports ,environment and the files of application itself.
The name of the docker file is fixed to ‘Dockerfile‘.
Docker-compose:
Docker compose is tool for defining and managing multipl-container docker applications.It uses yaml file to define services ,networks and volumes required by the application .With a single command you can build and start all the containers listed in the docker-compose.yaml file.
Commands:
docker-compose COMPOSE-FILE-NAME up [Used to run the file]
docker-compose COMPOSE-FILE-NAME down [Used to stop the file]
Let’s deep dive into implementing docker by developing a node.js application.
This is the simple node.js app which sends response from backend as shown below.
You can use this github link for reference : Github link

This application doesn’t have docker integrated with it initially.
Let us first build a image for this application using Docker file , which looks looks like this. Name this file as Dockerfile.
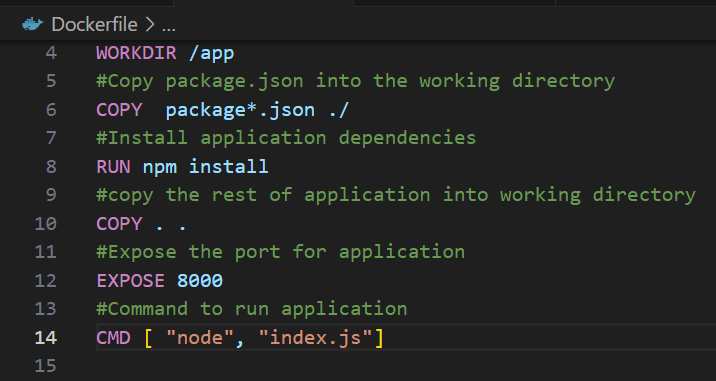
Bulild the docker image using the following command in terminal .
Command : docker build -t NAME-OF-IMAGE .
Run the container using the following command in terminal.
Command : docker run -p PORT:PORT NAME-OF-IMAGE
You can signup with docker in order to push and pull your images into the docker hub .After registering login into it through vscode as shown below.
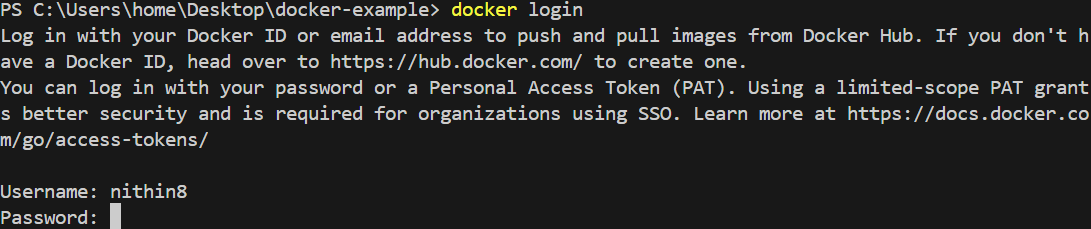
Use the following commands to push or pull the images:
Push an image: docker push YOUR-USERNAME/NAME-OF-IMAGE
You can see your pushed image in your hub.
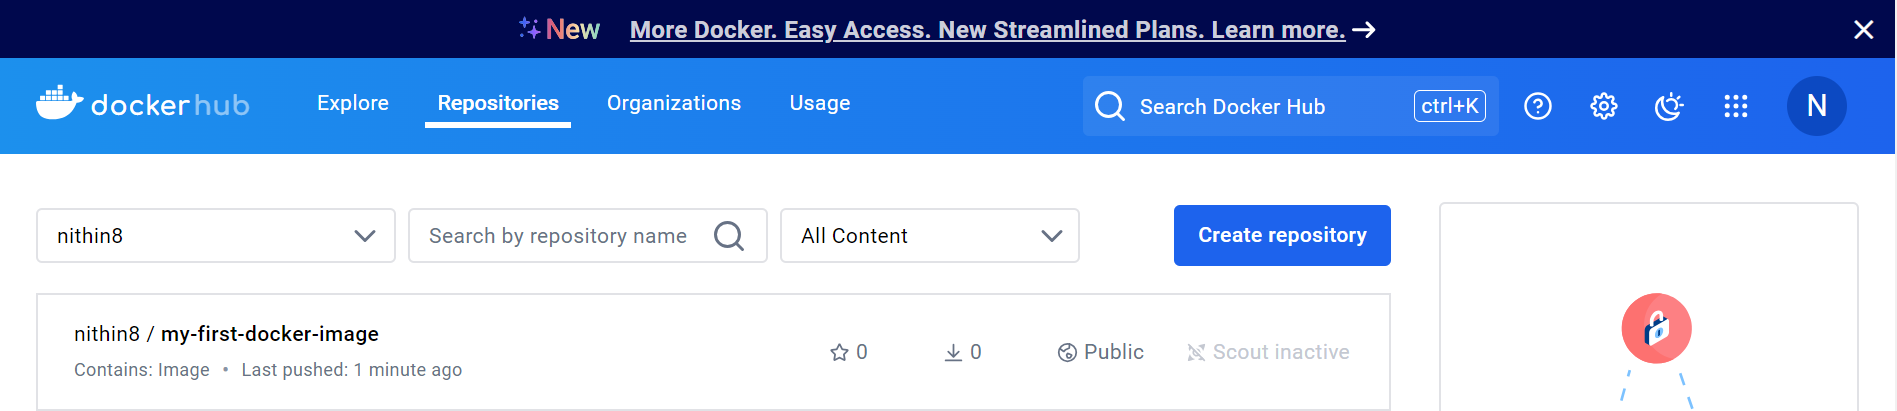
You can share it with your team in-order to maintain consistency by asking them to install docker and pull your image by using following command
Pull an image: docker pull YOUR-USER/NAME-OF-IMAGE
And ask them to use the image by running the below command
Run image: docker run IMAGE-NAME:TAG
They will also have the same dependencies and libraries as yours.
Thanks to Docker.